Happy new year! January brings more fun in my home lab, namely with some networking and new toys. I still have lots to learn here, so here are my current updates.
Installing the UDM-SE
A few months back, I bought a Ubiquiti Dream Router (UDR) for an all-in-one solution at my place. So far, it’s been working well: nothing to really complain about cause it just works and can route VPN traffic from my place to my brother’s place or my parents’ place.
At my parents’ place, their network setup was very simple with two distinct networks: one for default and another for guests, which I had provisioned as my standalone IoT network. Now recently, their neighbours had a break-in. Our family was already considering the installation of security cameras, so unsurprisingly, this incident expedited it. One of my other coworkers had a UniFi Protect system in place, and from what I could tell, things “just worked”. Since that was exactly what we needed, and I was already on the lookout for more networking features, I bought the Ubiquiti Dream Machine Special Edition (UDM-SE), 6 G5 Bullet Cameras, and a U6 Mesh for our Wi-Fi needs at the latter half of December 2023.
Similar to the UDR, the initial setup was a breeze. I plugged in the sleek-looking UDM SE into a power outlet, replaced our Google Home Wi-Fi pucks that have served us well over the last 5-6 years with the U6 Mesh, and within 5 minutes of setting up the initial network configuration, my home servers were back online. Re-configuring my Wi-Fi SSIDs was also done after another 5 minutes, with the adoption occurring within the minute of being powered by PoE, and Wi-Fi network configuration taking an additional few minutes.
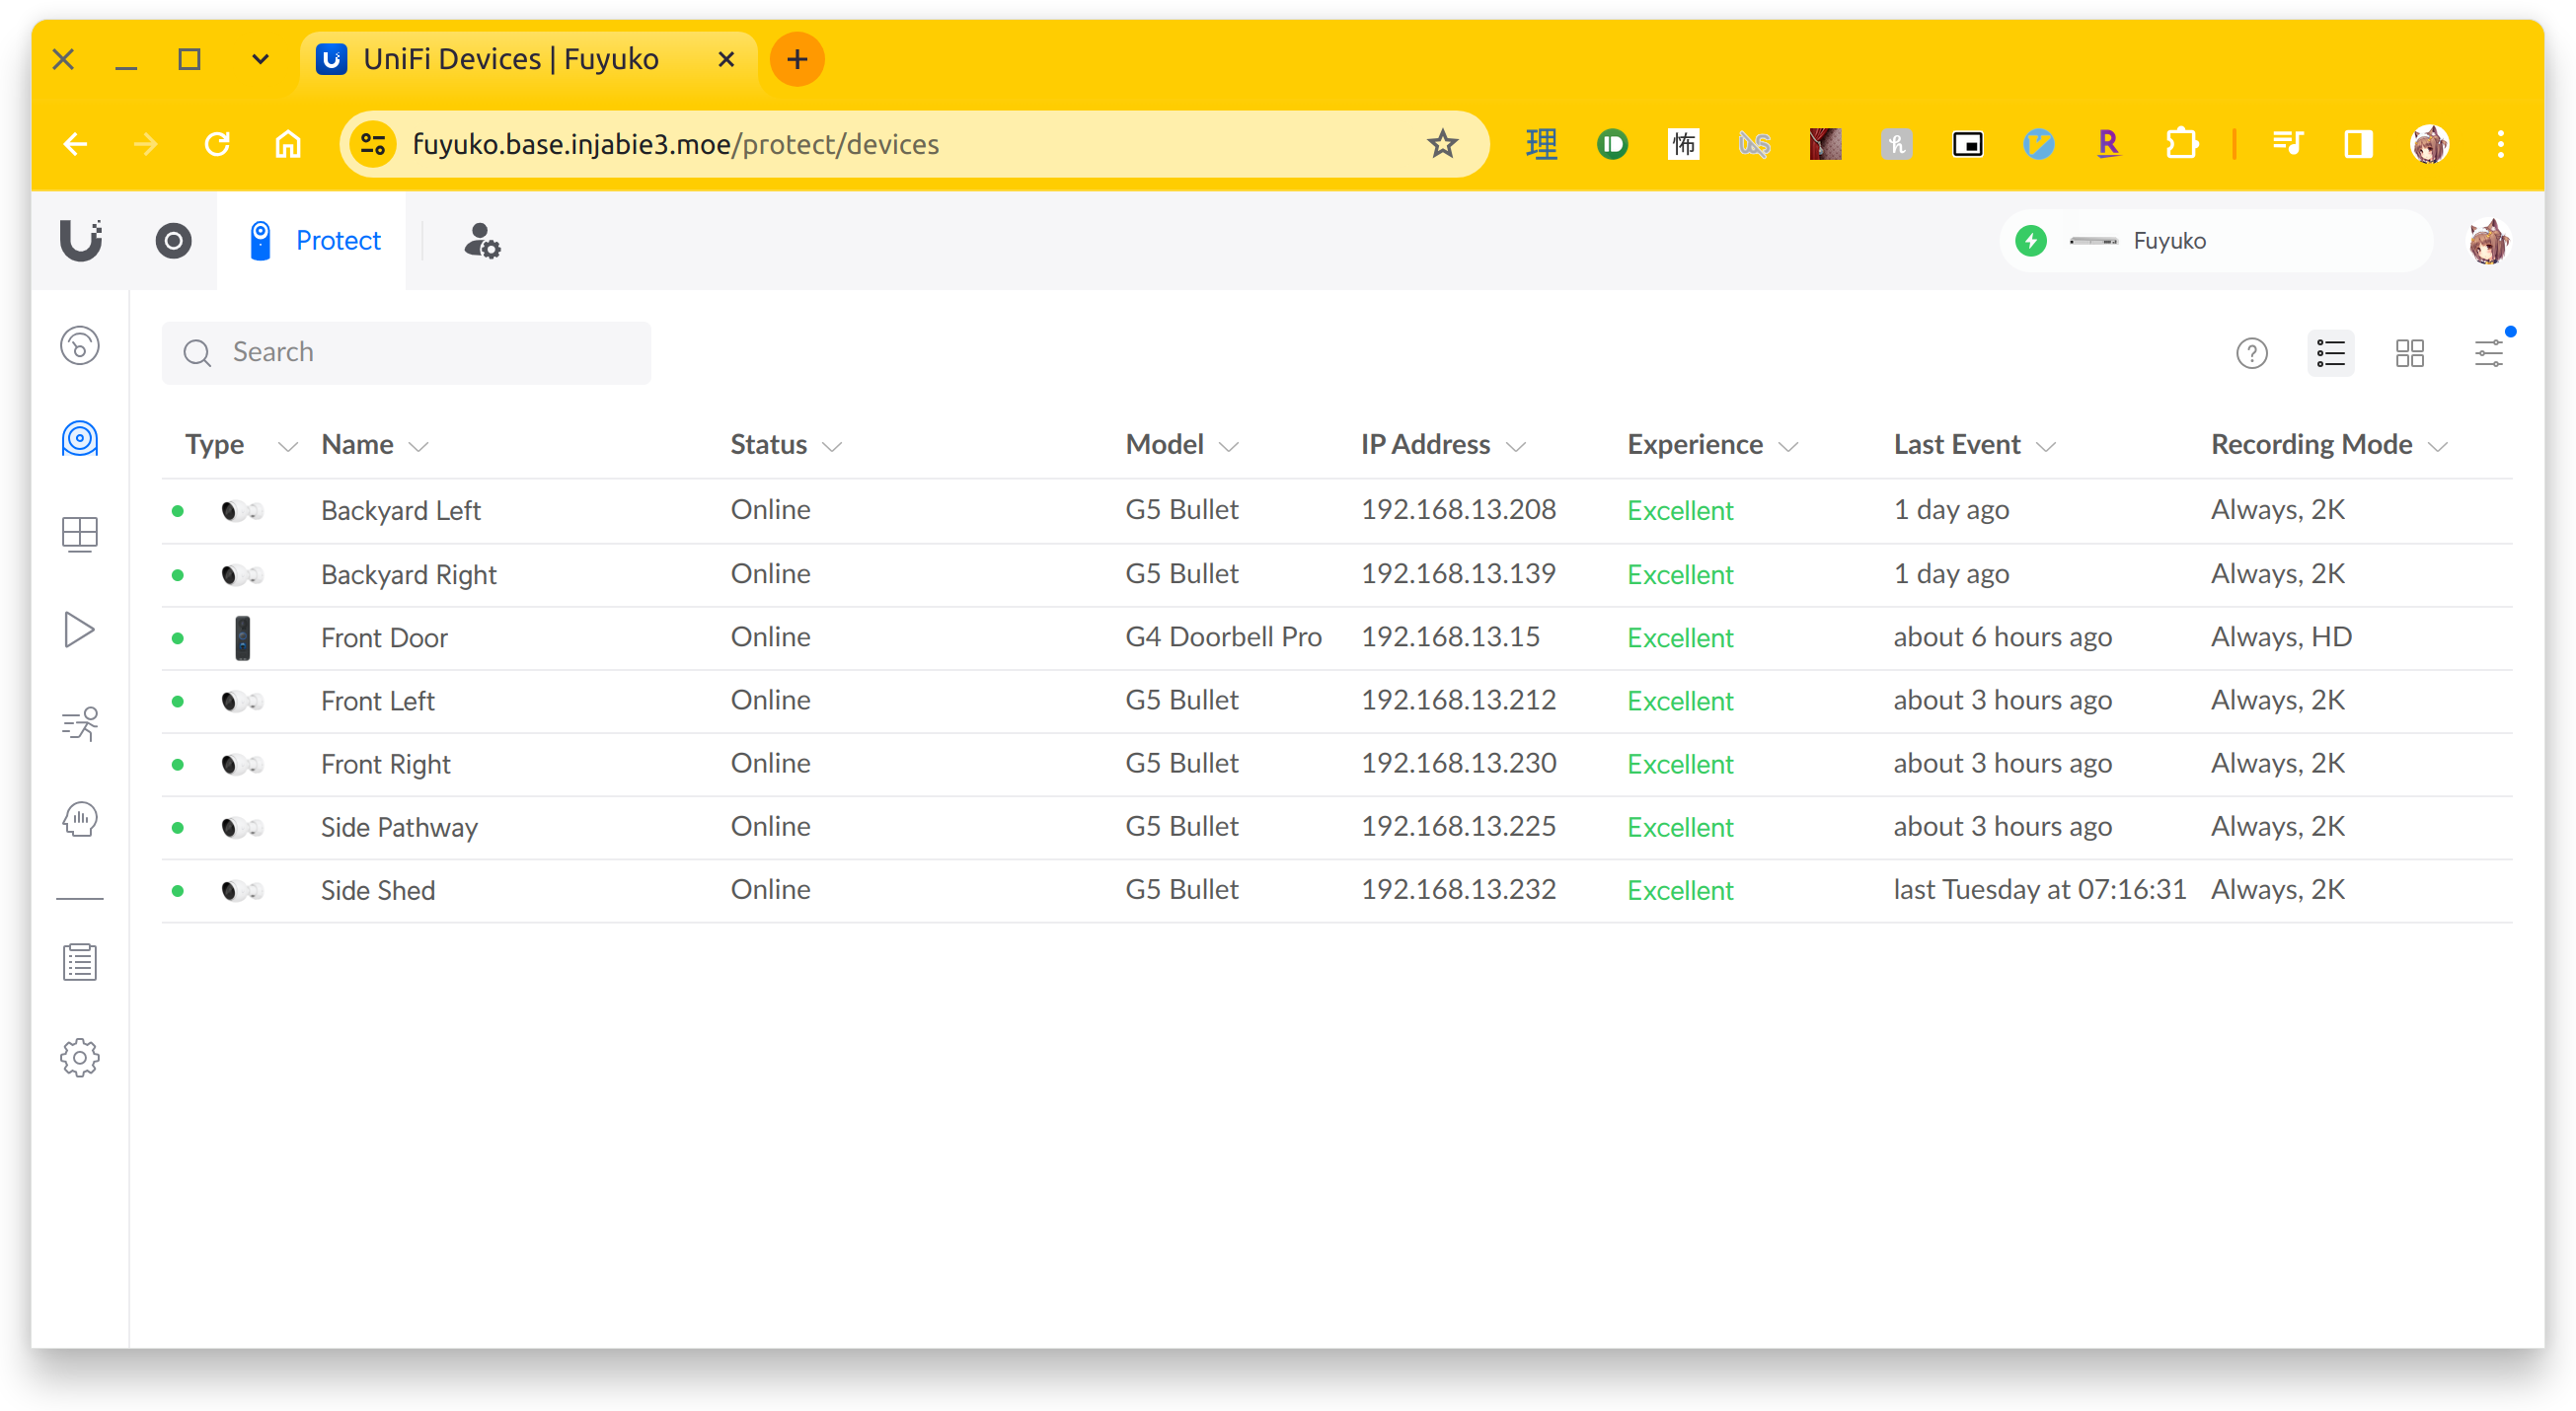
Setting up the cameras was a different story, mainly due to the nature of a new install. We had to hire our family friend (Eric) to run all of the necessary wiring to the basement where I had set up the UDM SE. After the install, the G4 Doorbell Pro also came in stock, so I bought that and installed it myself. Unfortunately, the chime was incompatible with the doorbell, as it used a 12V circuit, so I’m currently powering it with a USB-C cable, with hopes to switch it to PoE once the PoE adapter comes in stock. I haven’t had a chance to explore a solution for the bell situation yet, but the camera recording and two-way intercom with the UniFi Protect work as intended.
Back to the UDM-SE: I don’t have a rack to rack mount it since it’s only one device right now, so it’s currently sitting on top of my other makeshift hand-me-down machine-turned-server. Overall, the noise level in this room is still quiet, which is acceptable for my parents.

For the most part, this was a disconnect-and-replace process. I kept the subnets the same for now so that ZeroTier can still keep working with my current virtual machine acting as the gateway for my site-to-site VPN. I haven’t jumped ship to Ubiquiti’s Site Magic Site-To-Site VPN yet, since I don’t have a UniFi device at my brother’s place. Being able to use ZeroTier to route between my home networks and my mobile devices has been great, especially for a split tunnel-like VPN experience, with internal traffic routing through the VPN tunnel while other traffic routes directly through the default gateway.
SSL Certificates
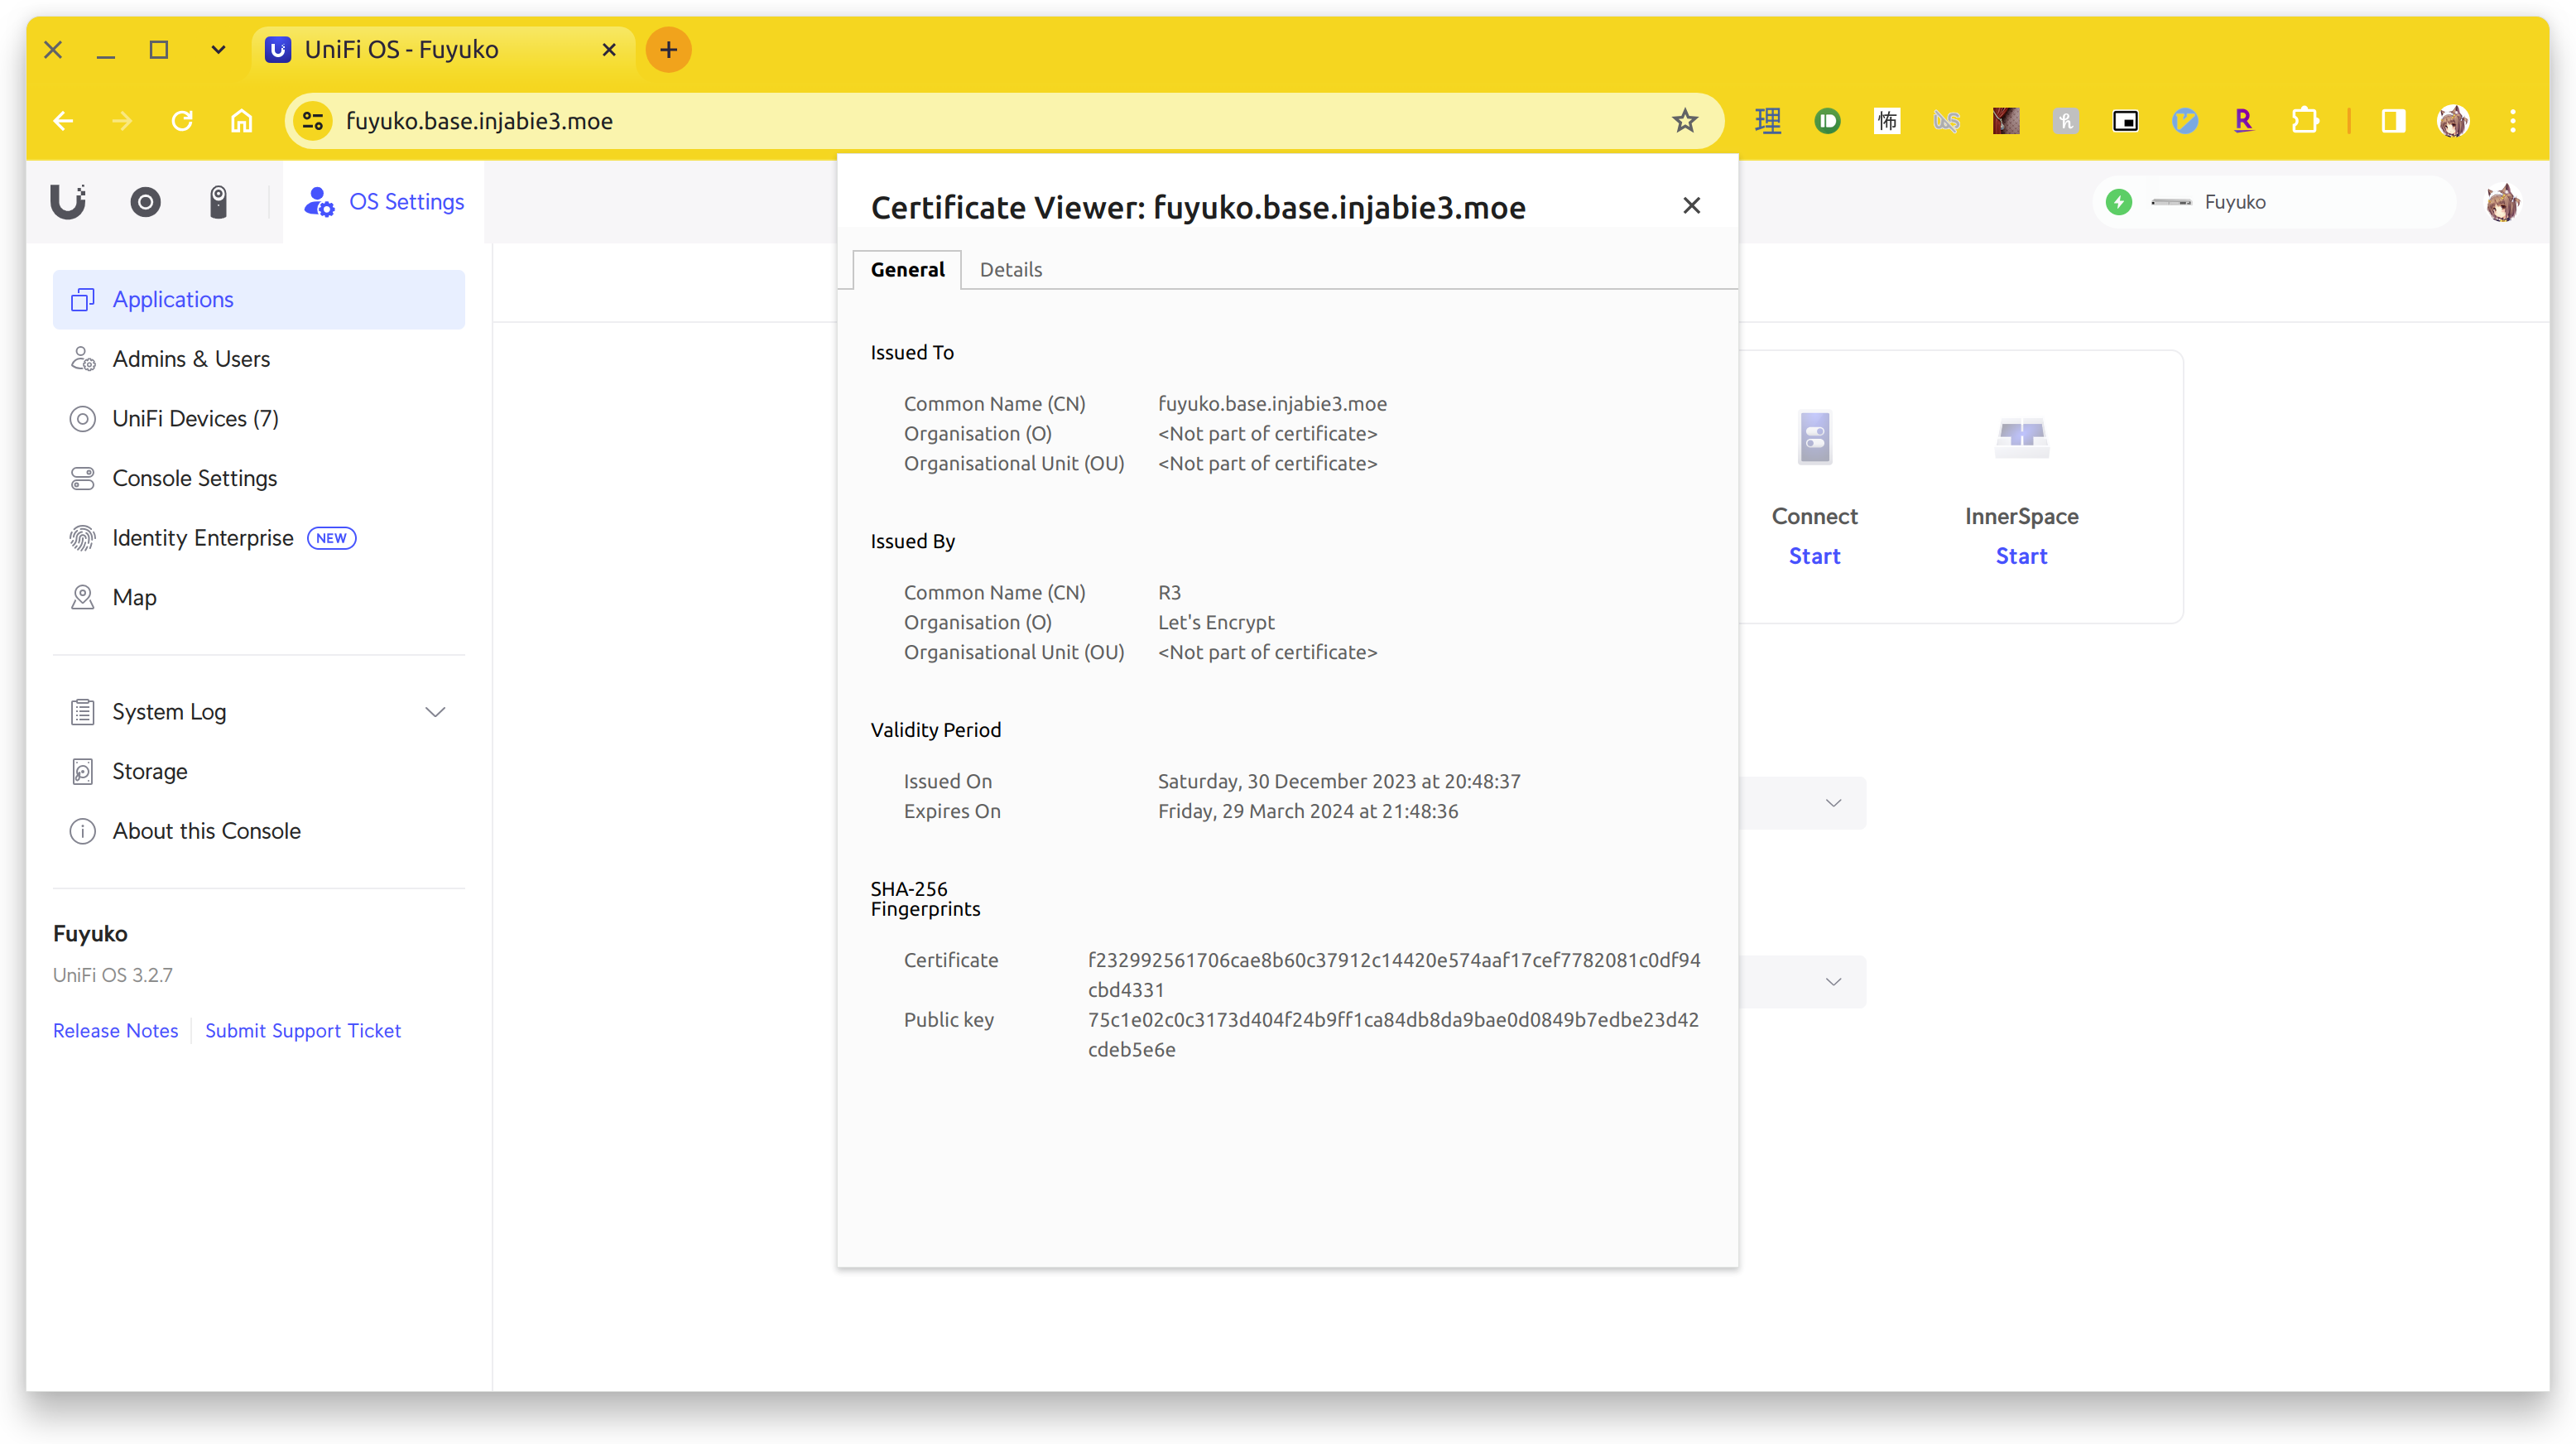
While I did enable remote access on the UDM-SE via unifi.ui.com, being able to access it directly on the LAN is also super useful to have, as I can skip the cloud and stream the video directly (with the exception of VPN, but the point still stands). As with any type of HTTPS access on LAN, you’re typically presented with the “Your Connection is Not Secure” warning page since the SSL certificate is self-signed. To address this, a local DNS hostname with an accompanied SSL certificate is required. Fortunately, we can use free SSL certificate providers like Let’s Encrypt to generate a certificate for our local DNS hostname without having to install or maintain a personal certificate authority. There are also several tools out there that can help us automate these sorts of tasks, such as acme.sh, certbot, and Lego, among others.
I’ve used acme.sh in the past to set up HTTPS for my Synology NAS, but it didn’t seem like they had something simple for the UniFi lineup (at least one that could run directly on the box).
Fortunately, the udm-le repo on GitHub came to the rescue. Underneath the hood, it uses the Lego client to facilitate DNS hostname verification, including Cloudflare’s API. For me, this works as I use Cloudflare for my external DNS entries on my domain. While the initial process didn’t work due to me changing the upstream DNS on the UDM-SE to point to my internal AD server, patching it with an additional parameter got me on my way. Now I can finally be presented with a valid certificate while accessing it locally or remotely via VPN!
.
Wi-Fi PPSKs
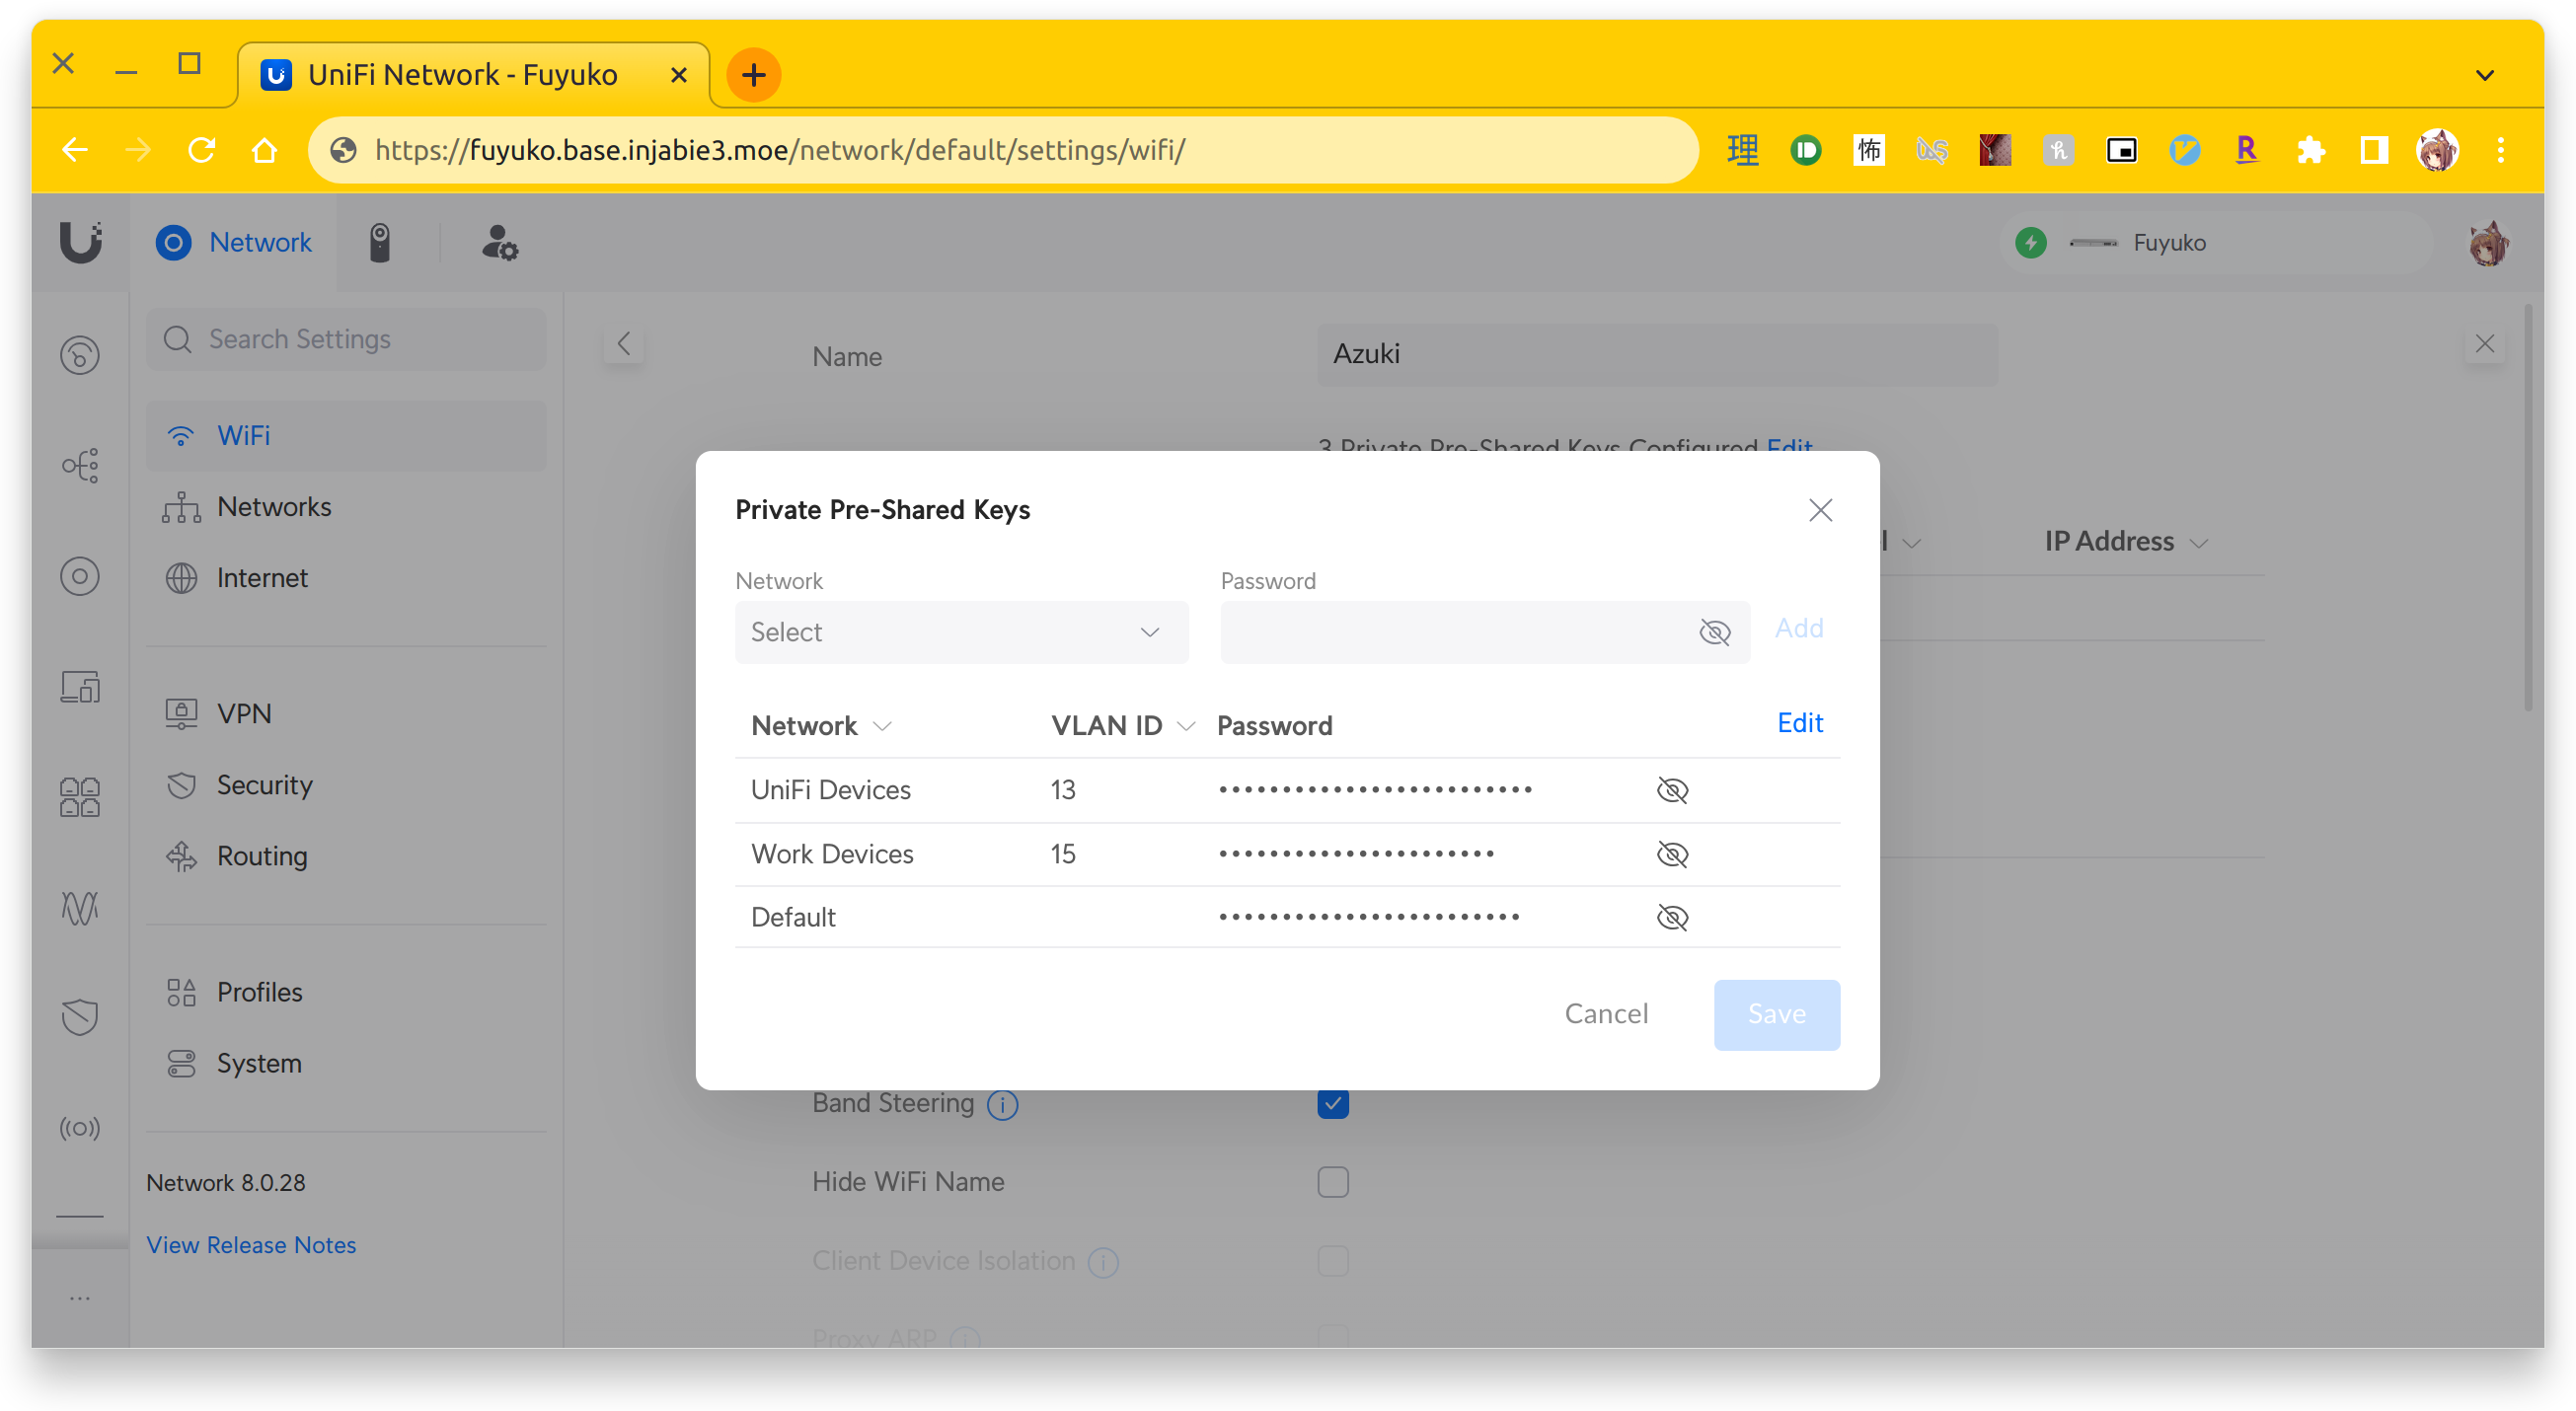
To help segment my network, I’ve been playing around with additional subnets. I’ve been used to mapping SSIDs to different networks, but you can’t broadcast that many SSIDs. This is especially true if meshing is enabled (in my case it isn’t, but it is something to keep in mind in the future if I add another AP). Instead, I recently discovered private pre-shared keys (PPSKs), where a single SSID can have multiple passphrases/keys, with each key mapping to a different, underlying network. I really like this concept, so now I have my work laptop connected the same SSID but with a different key associated with an isolated network segment. My doorbell also has its own key, connected to a camera subnet isolated from the rest of my network.
Next Steps
Now that their network and cameras have been configured, I still have several things I want to do. In order to get Google Cast to work, my Google Home devices still have to be on the same network to be detected on my phone. While there are some guides out there (like this) that describe how to get it to work across multiple subnets, I still haven’t gotten it to work alongside additional firewall rules in place to isolate the several networks I’ve created at my place. Still have lots to learn here…
Anyways, that’s all I have this time around. Until next time!
~Lui
