Hello there! It’s been a while since the last post. I’ve been busy making some infrastructure changes at home. By the time this post gets published, my personal web services will have been migrated to Docker. A few of my coworkers mentioned containers to me recently, and being someone that was using physical machines and transitioned into virtual machines roughly six years ago, now seemed like a good time to begin exploring containerization.
Containers weren’t a new concept to me. I used containers on the daily at work, and I modified Dockerfiles in some of the services we deployed at work. What was new to me was this concept of Docker Compose and using it for my web services. It was pretty neat seeing the ability to define your services as containers, along with their persistent data mounts, and with a simple docker compose up -d, you can have Docker build the necessary images, create the required containers, and spin them all up to run your services. It makes version control of all the required configurations really nice, allowing me to bring my data onto any Linux machine with Docker, and I would be able to deploy in minutes.
Migrating to Docker
These past few weeks, I’ve been creating and testing my Docker configuration locally on my Framework laptop, which was running Ubuntu 22.04.1 LTS. For my web services, I opted for the following containers:
- Apache2 for internal Intranet
- Apache2 for external access.
- MySQL for database storage.
- Cloudflare’s
cloudflaredfor external access.
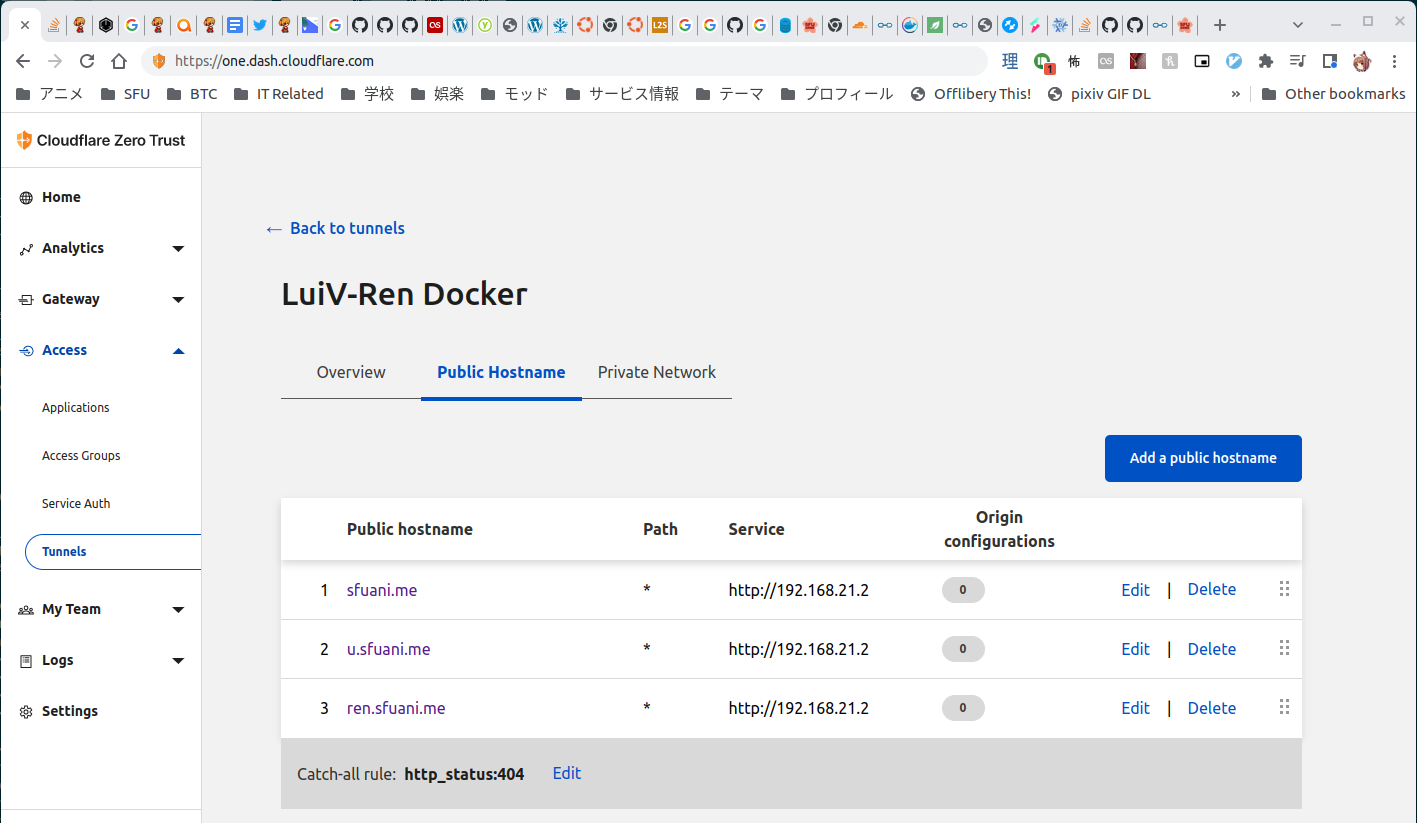
I opted for two separate Apache2 containers because I ran into an issue last year with internal sites being accidentally exposed to the Internet. Having internal and external sites separate and assigned different IPs will prevent this from happening, and this goes hand in hand with Cloudflare Access Tunnels. The tl;dr is that instead of exposing the origin server to the Internet for Cloudflare to proxy, Cloudflare’s daemon (conveniently named cloudflared) can be installed internally to connect directly to Cloudflare’s edge, eliminating the need to directly expose the origin server to the Internet.
In my staging environment, the container configuration worked pretty well! There were some interesting quirks, like POST file sizes and additional PHP extensions required for WordPress, all of which has now been accounted for via source control. There was also an instance where restarting the Docker host would hang the entire host because one container wouldn’t terminate, to which StackOverflow came to the rescue. That was also added to source control, phew!
Before migrating my personal web services to Docker, I also had to break apart some inter-VM dependencies between my personal VM and the SFU Anime Club VM. My personal VM was acting as a reverse proxy for the *.sfuani.me hosts sitting on the SFU Anime Club VM. To do this, I decided to use a similar Docker configuration with those sites, minus the internal Apache2 server. Once again, Cloudflare Access Tunnels were deployed to expose these sites directly to the Internet, thereby eliminating the reverse proxy dependency. Hurray!
With the dependencies eliminated, I can start the migration to Docker. But before that…
Ubuntu as a VM/Docker Host
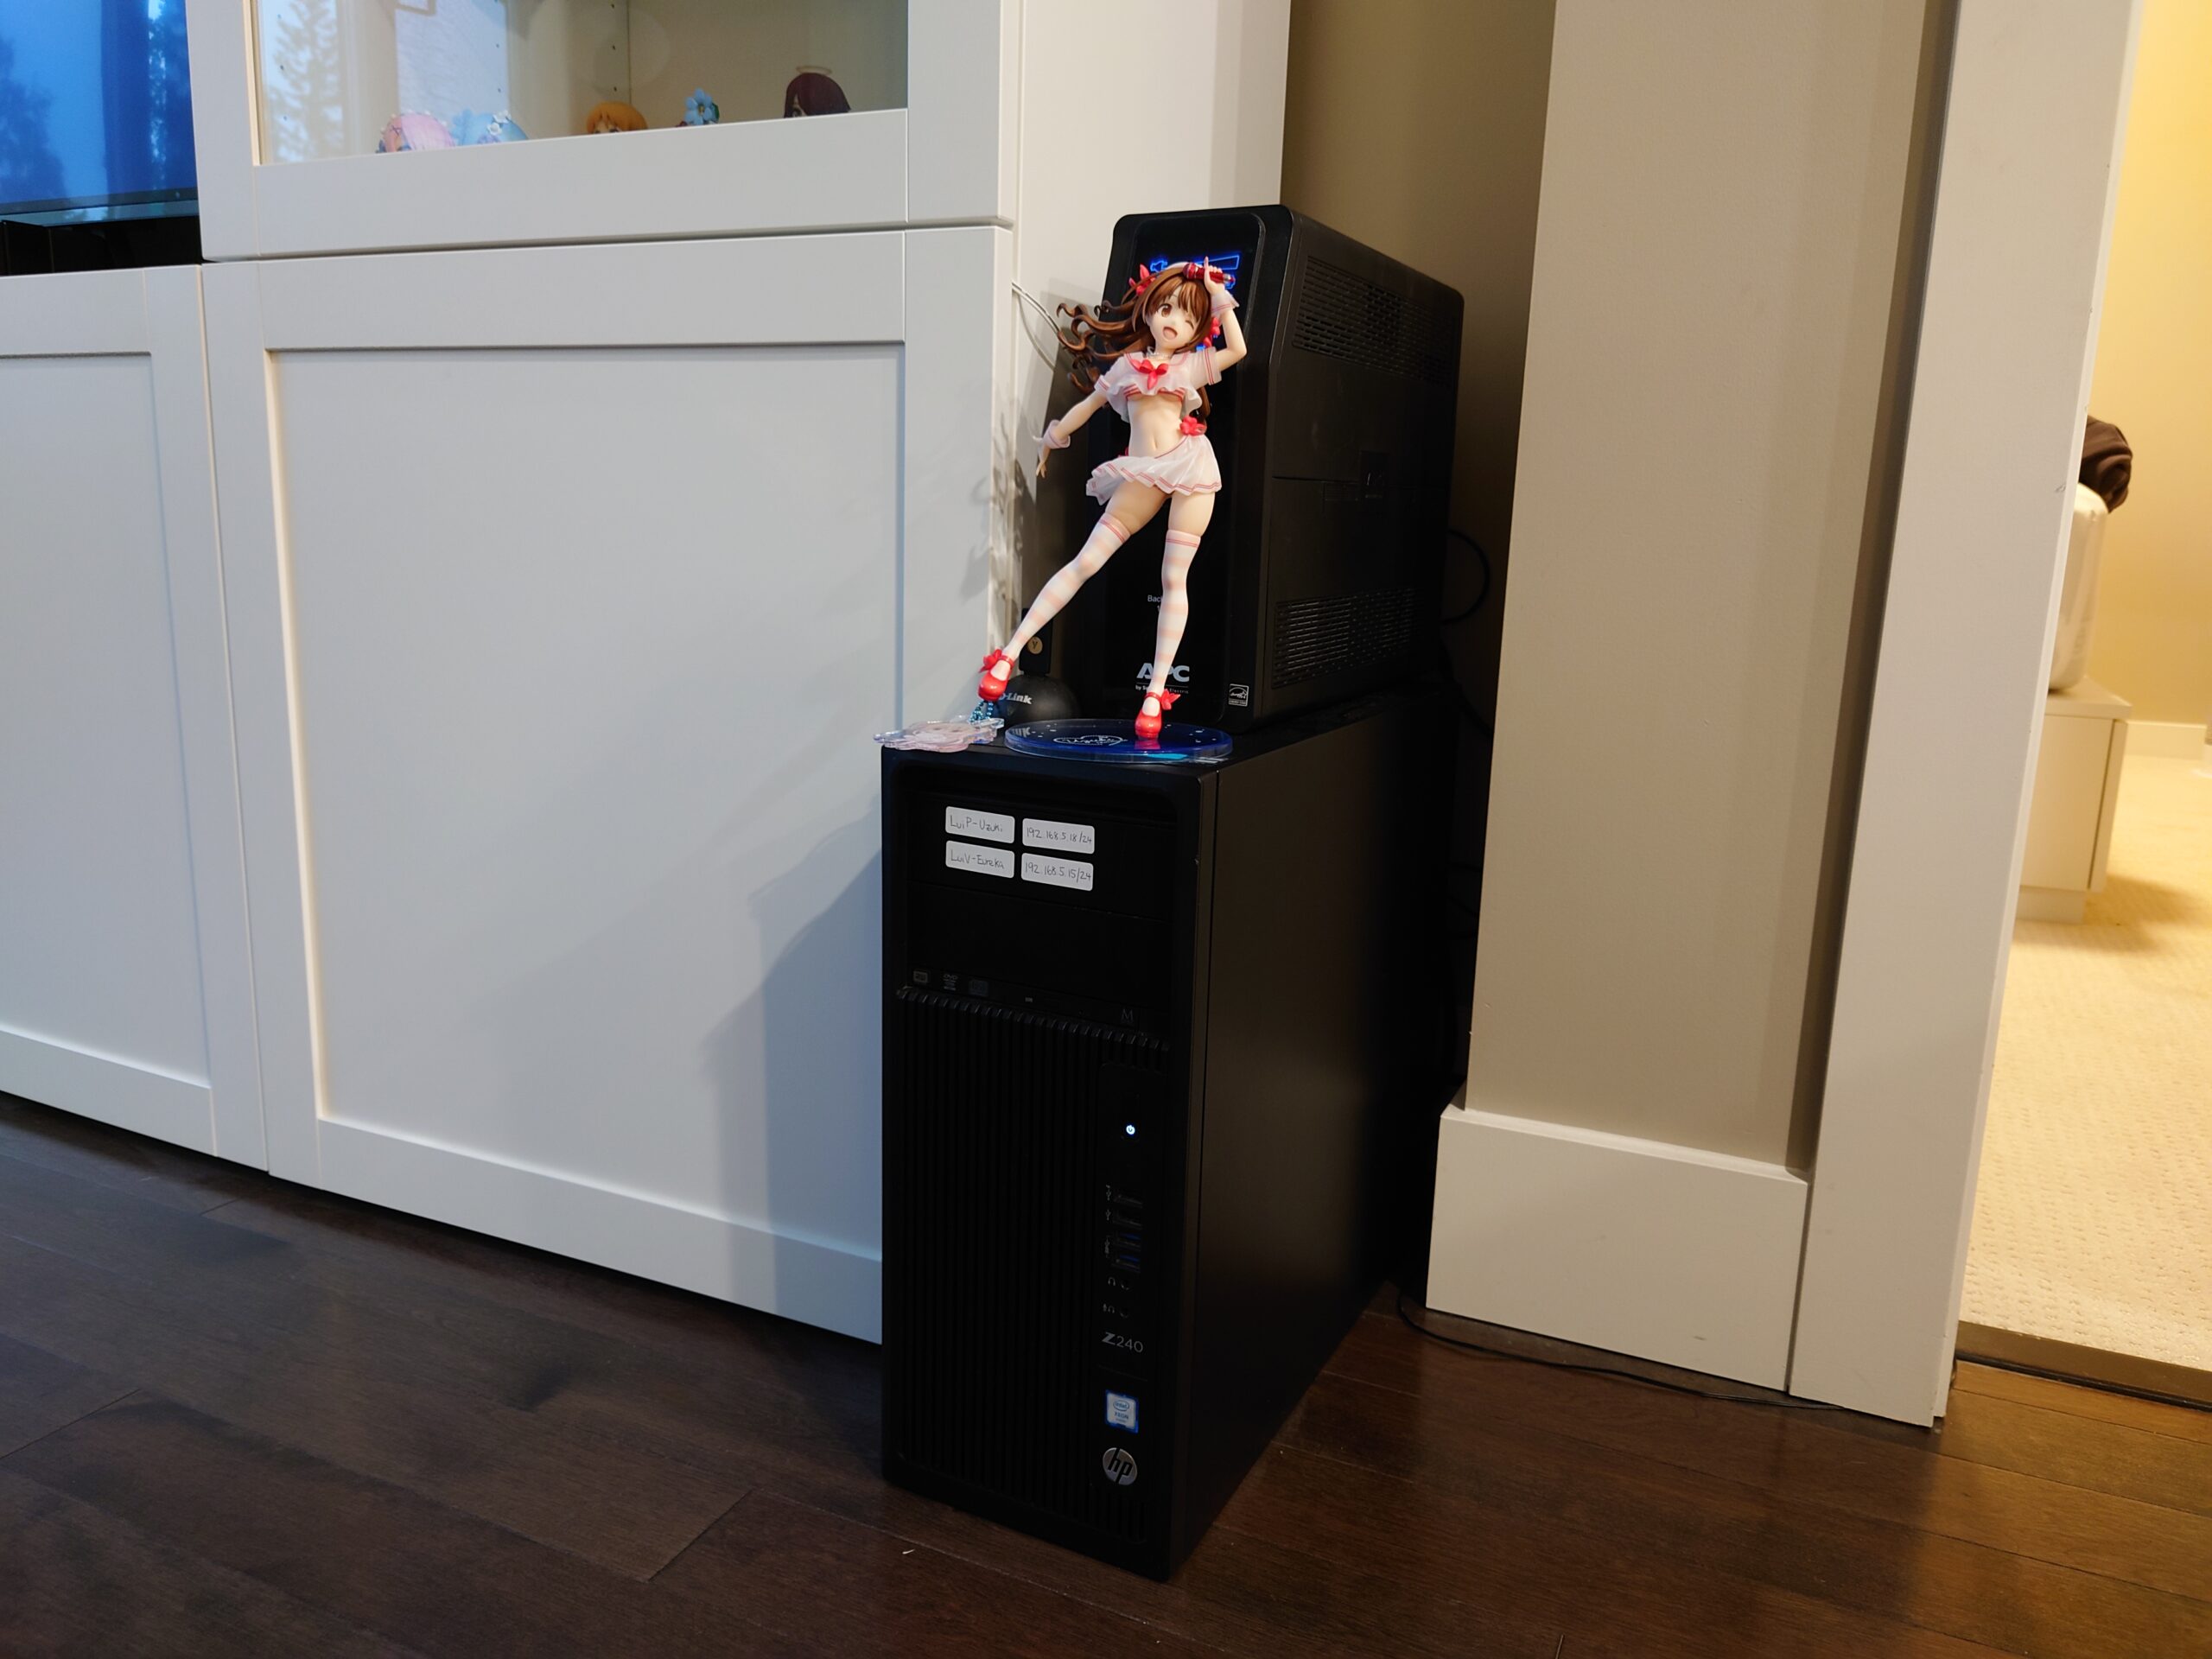
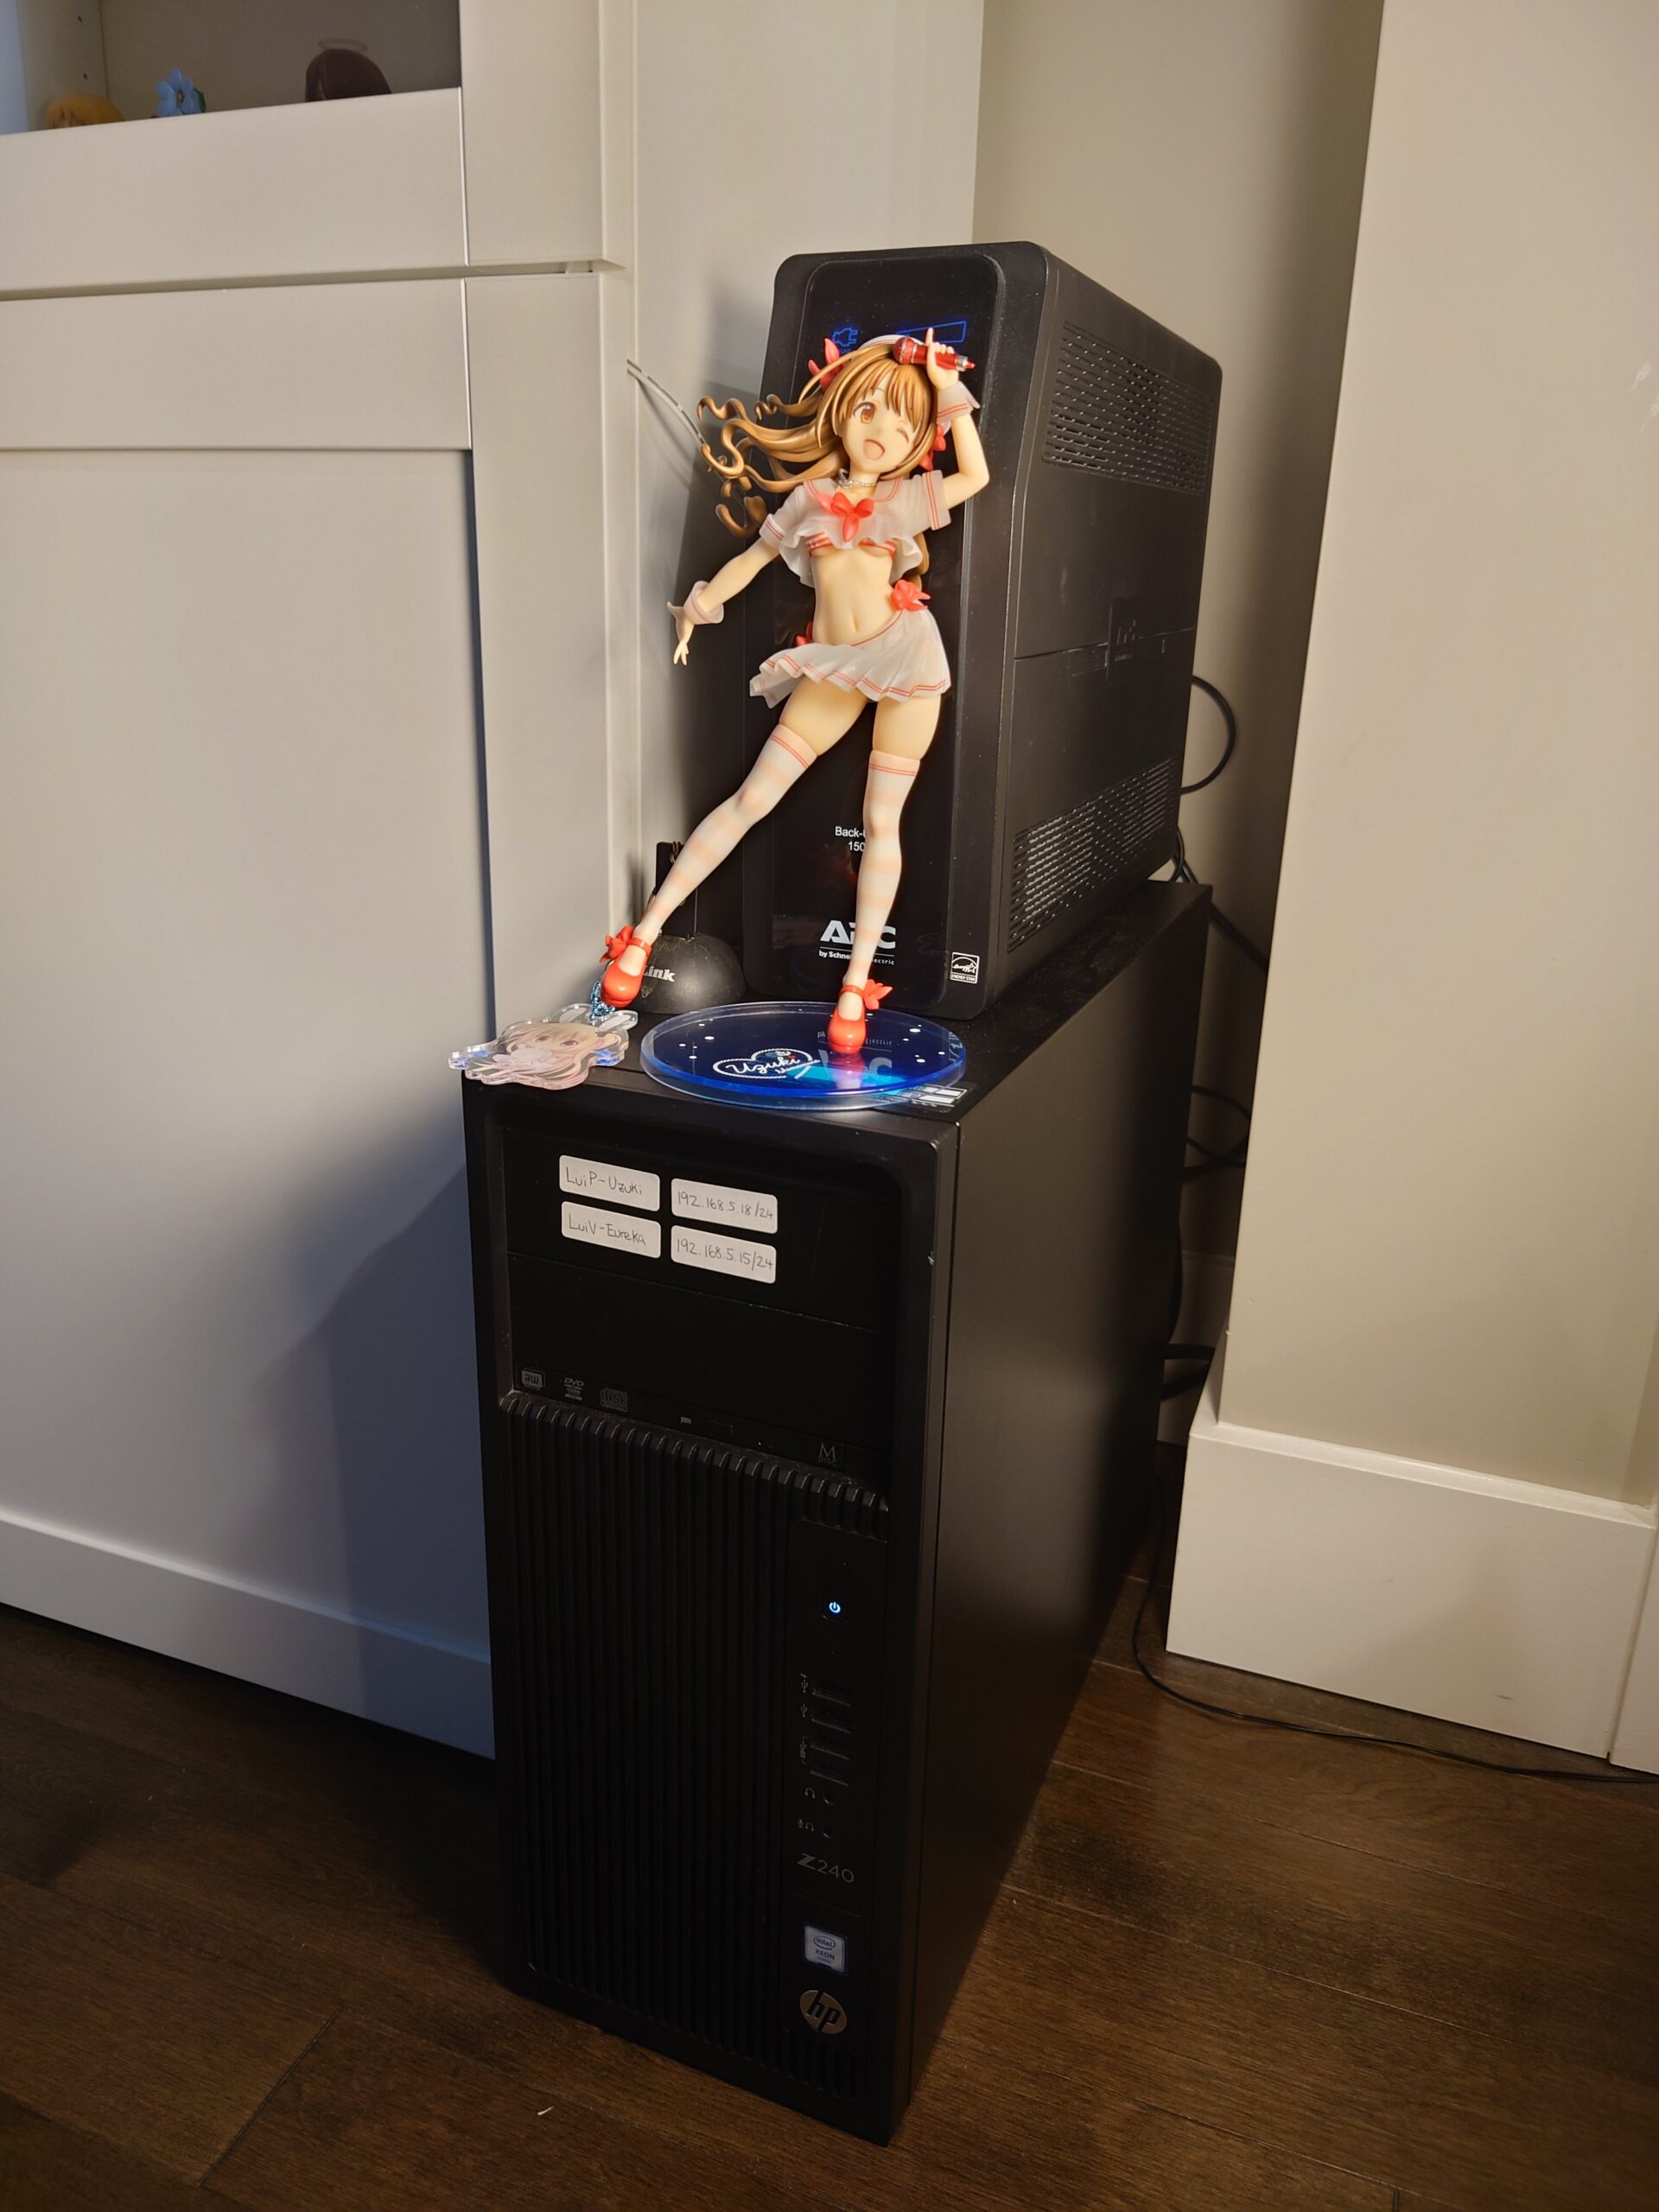
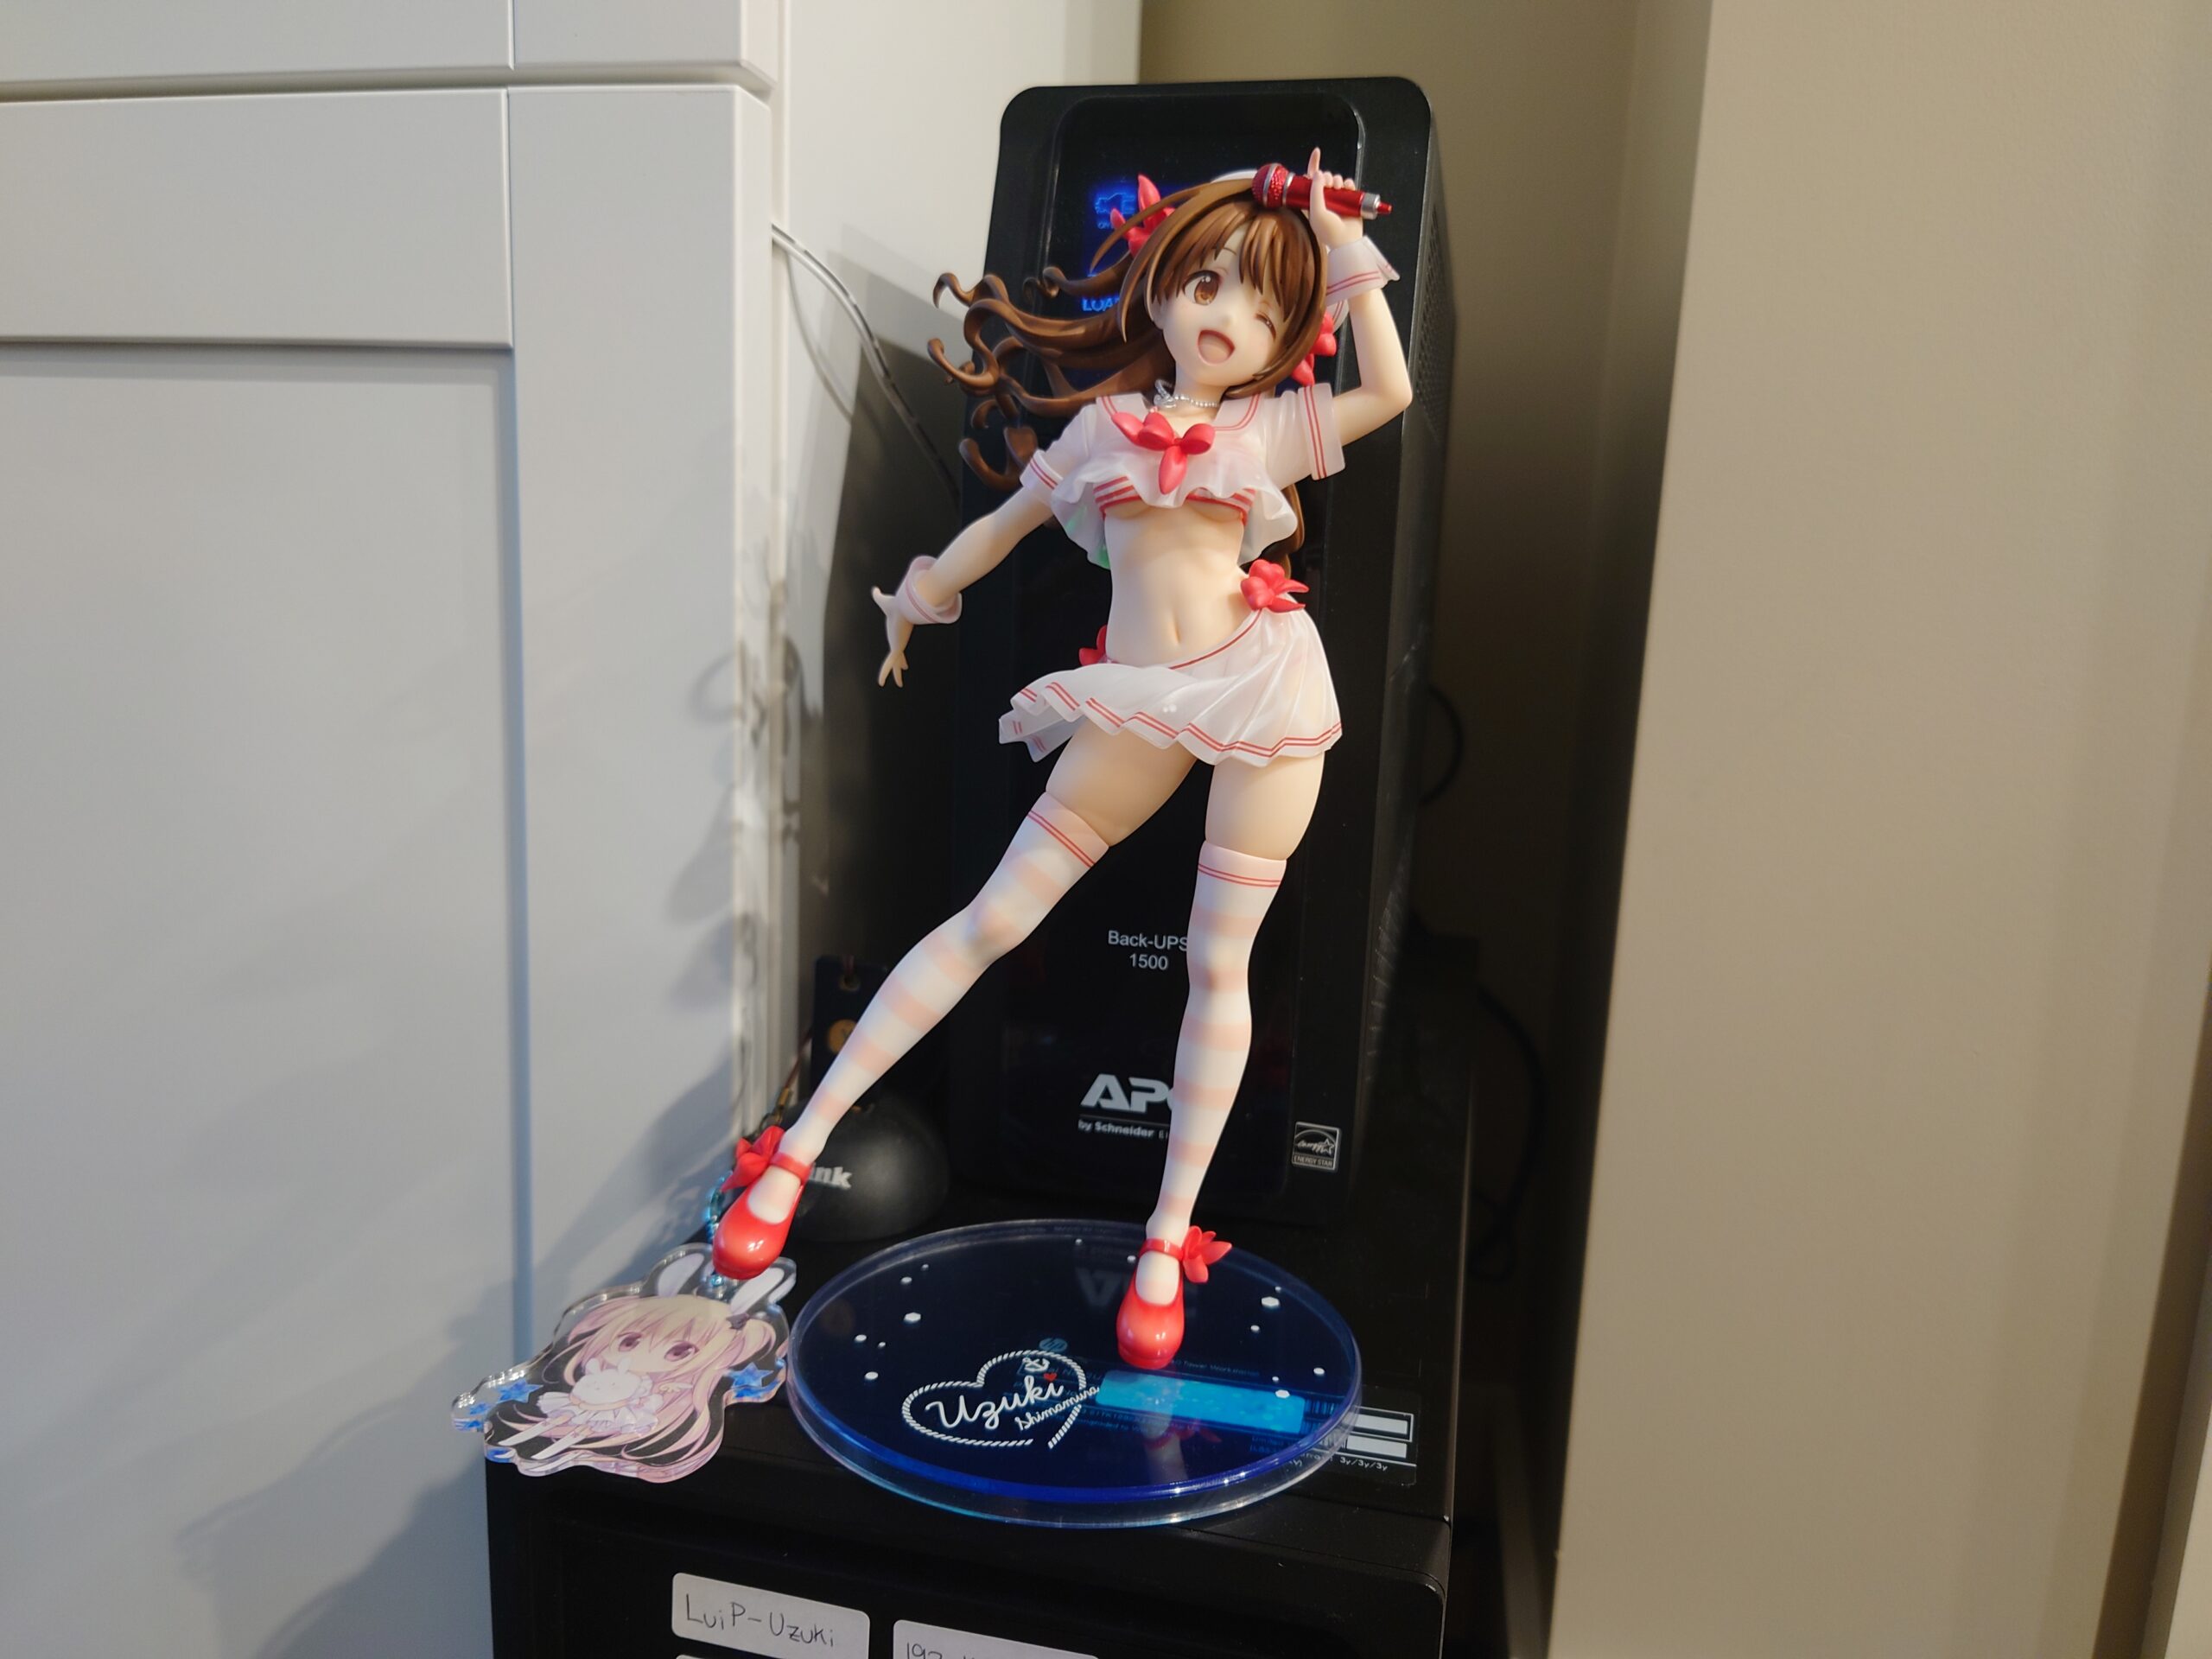
I recently got another hand-me-down machine from my brother’s workplace. This one’s got an Intel Xeon with 2x8GB DDR4, which is definitely an upgrade from the previous Core 2 Quad with 2x2GB DDR3 RAM. The old-now-new machine still has 2 free DIMM slots so I can probably upgrade this to 32GB if I need in the future.
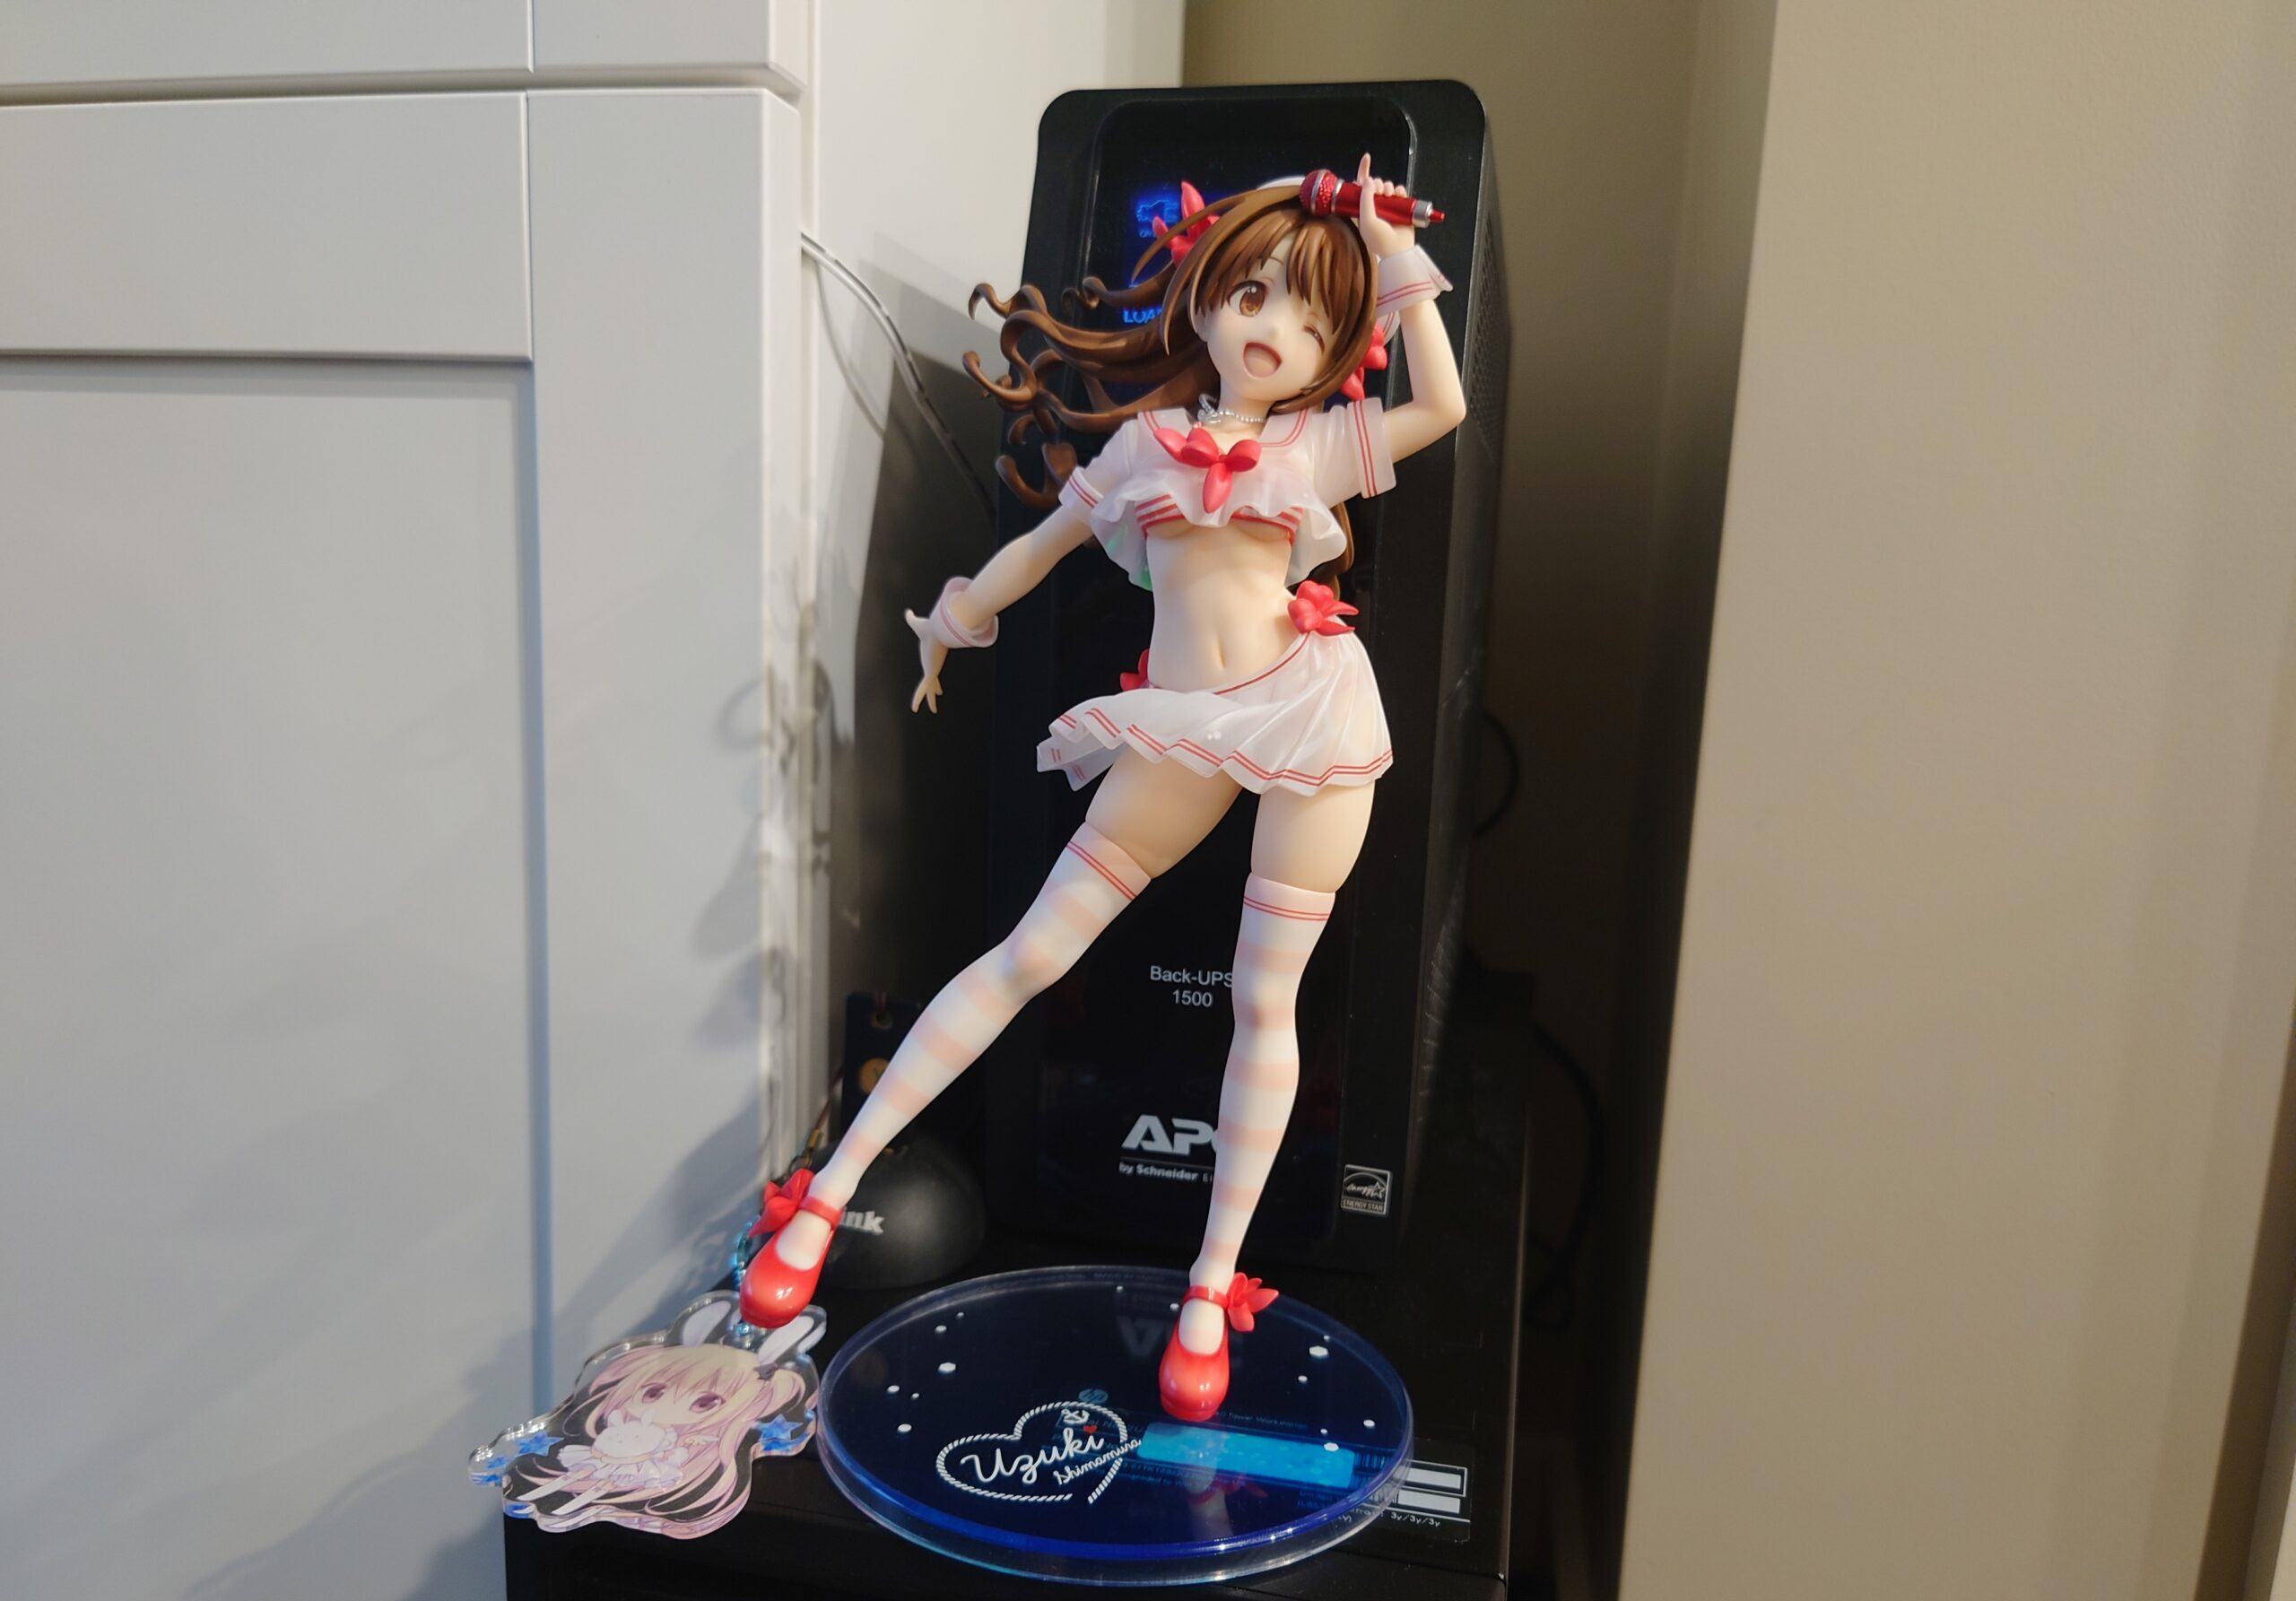
For naming, I decided to follow suit with my iDOLM@STER girls. The servers at my parents are Miria and Sachiko, and seeing that I just got an Uzuki figure recently (and needless to say another stunning figure from ALTER), this new box is named Uzuki. Here’s to hoping she’ll bring me smiles with the things she’ll be hosting in the future 🙂
Setting it up was pretty easy, aside from full disk encryption setup. This machine only has TPM 1.2, so the guide I’ve looked at before doesn’t really work. My workaround was to use a Yubikey key configured with a static password, since the server is headless. This does mean that remote reboots will not be possible unless I have something like a PiKVM to connect to its physical ports, as I need to enter the boot password, but I can sleep a little easier knowing that my data is encrypted at rest.
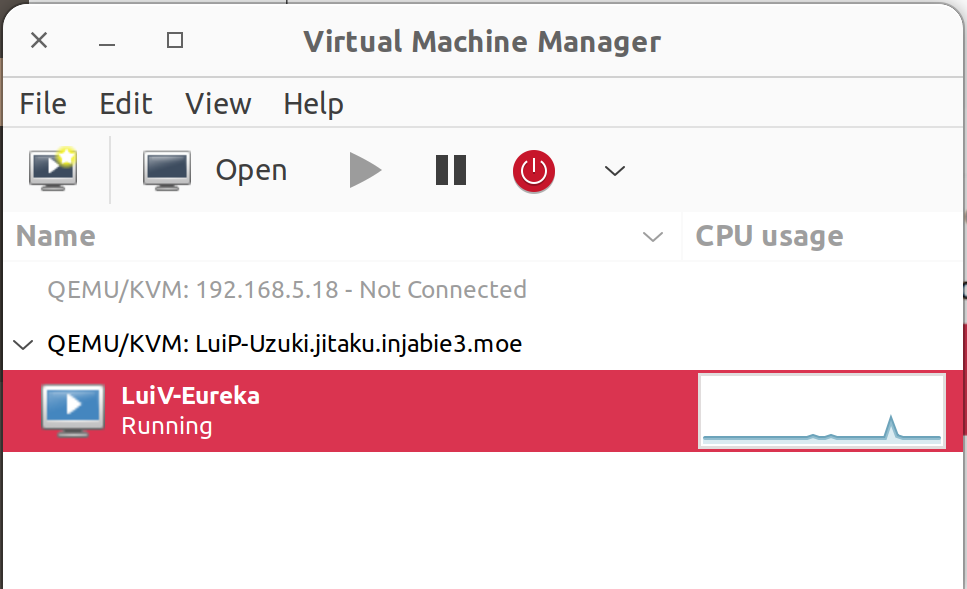
Because the previous machine was running Windows Server 2016 and acting as my DNS server, I needed to convert it to a VM. To make it easy, I wanted to do something like I did before when I converted my Ubuntu physical machine to a VM: pass the physical disk directly to the VM. Knowing nothing about Linux virtualization, I did some digging, and stumbled upon QEMU/KVM, which seemed to accomplish everything that I wanted. With virt-manager on my Framework, I can manage it remotely with its GUI, which is perfect. If all else fails, I can still SSH into the VM host and use virsh to manage it.
Because the VM needs to directly communicate on the LAN (to handle DNS and DHCP for the network), I also needed to create a bridge. Newer versions of Ubuntu no longer use /etc/network/interfaces. Instead, they use netplan, which is pretty nice, too. It’s a YAML-based configuration file, so all I needed to do was create a bridge interface with an IP address and hook it to the physical interface. My VM also hooked onto the bridge, and everything just worked. The one pain point I had was on host boot up: it took an extra 2 minutes for SSH to be ready. After some digging, it looks like it was waiting for the bridge interface to become ready, so the fix was to mark the interface as optional: true to prevent boot up from waiting for the interface. This shouldn’t matter too much because I configured a static IPv4 address on the bridge.
As I mentioned in a previous blog post, I was also using a Rapsberry Pi for connecting my parents’ network with my network. Since I finally have a Linux box at my place, I decided to install ZeroTier and configure my VPN here to be able to re-purpose my Pi for something else in the future. Timelapses were the first thing that came to mind; we’ll see :). As expected, things just worked without further intervention.
In addition, my NAS has status information on the UPS shared with this new server. Fortunately, my work-in-progress API can run on this new box, so if I lose power on my NAS, it’ll safely power off this server.
With that out of the way, instead of using Docker on my old VM, I migrated most of my data to the new machine, including this blog. While that was happening, I configured my tunnels:
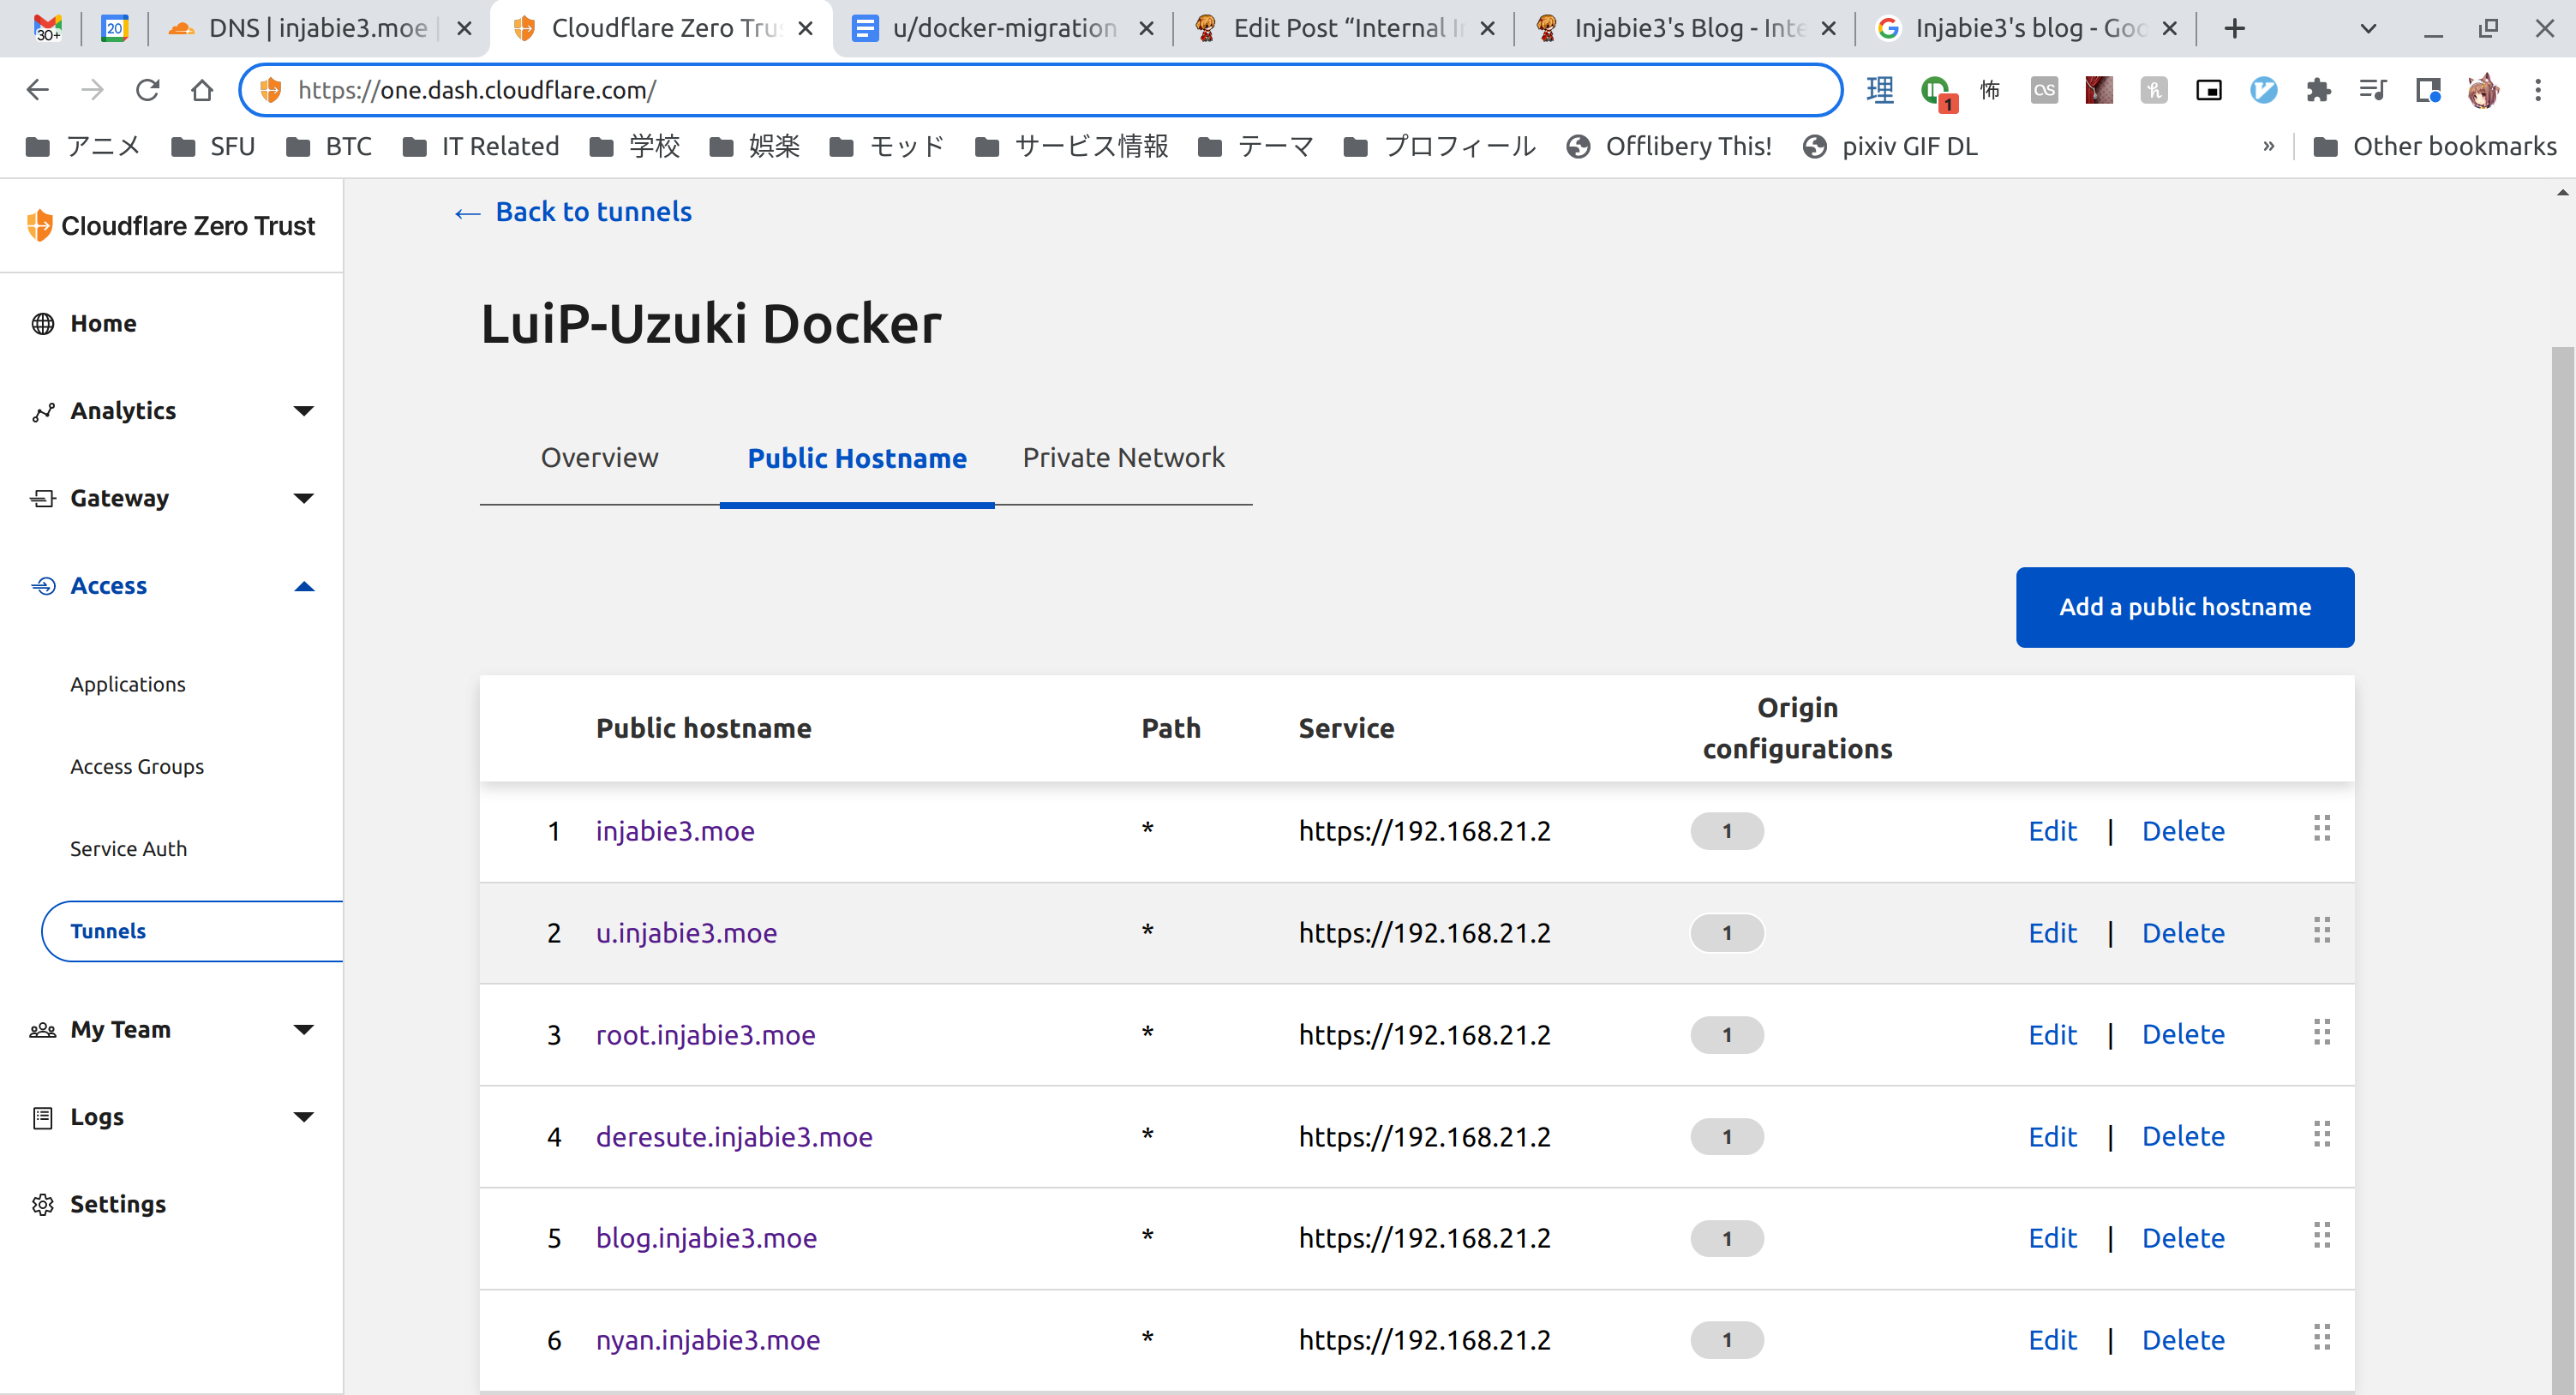
Once I verified all my data was in the right place, I ran the following and my sites came back online!
[git:master] injabie3@LuiP-Uzuki:~/git/docker-config$ docker compose up -d
[+] Running 7/7
 ⠿ Network injabie3internal               Created                               0.3s
 ⠿ Network cf                             Created                               0.1s
 ⠿ Container docker-config-mysql-1        Started                               1.2s
 ⠿ Container docker-config-apache2-int-1  Started                               1.5s
 ⠿ Container docker-config-certbot-1      Started                               1.2s
 ⠿ Container docker-config-apache2-ext-1  Started                               1.6s
 ⠿ Container docker-config-cloudflared-1  Started                               0.9s
[git:master] injabie3@LuiP-Uzuki:~/git/docker-config$
The one thing that definitely kept me on track was making a list of steps to follow before starting the whole site migration. Documenting everything that went well and didn’t go so well will help me in the future should I have to do something similar again. Overall, the prep work for this spanned more than a month as I had to find a good chunk of time outside of work to come up with a design and verify it in a staging environment. As for the actual migration, that took around 6 hours, with dinner and anime breaks in between.
Anyways, that’s all I got for today! There’s still a few things left to do, like migrating some files over from my deresute cronjob. In the future, I am also looking at creating another Plex server here so that I don’t have to go through the VPN to stream everything. For now, I’ll leave you with Uzuki posing on top of her machine, after which she’ll head back into the display case.

Until next time!
~Lui

[…] that I had recently containerized many of my internal applications and moved those applications from my parents’ place to my current home, running Plex on […]